

By Sonya Sanford
(JTA via The Nosher) – You may already be familiar with Mimouna, a Sephardic holiday that originated in Morocco and marks the end of Passover. On the night following the last day of Passover, the end of eight hametz-free days is celebrated with a feast of treats.
In Morocco, neighbors travel to each other’s houses, it is customary to leave all doors open to welcome any possible guests. Tables are laden with symbols to ensure a good year: blossoming spring flowers, fish for abundance and fertility, and dates sweetened with honey to inspire an equally sweet life. The next day, festivities continue with barbecues, picnics, and large gatherings.
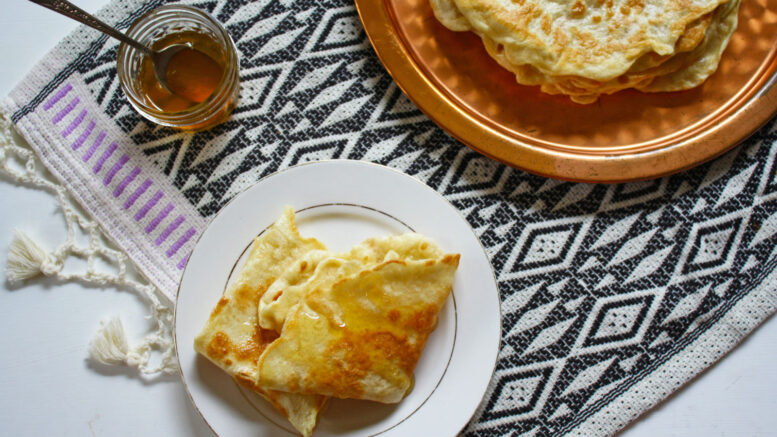
One of the most common dishes prepared for Mimouna is the crepe-like mufleta (or moufleta). You might also find nougat, fazuelos (a fried thin pastry), couscous-au-lait (sweet couscous with milk), almond cookies, marzipan, stuffed dates, and a variety of other sweet and savory baked goods. Mimouna’s popularity has expanded in recent years beyond North Africa and is even widely celebrated in Israel.
Two of my favorite dishes for this holiday are the crepe-like mufleta and sweet stuffed dates. My stuffed dates are a slight deviation from the norm. Instead of marzipan, these dates are stuffed with a combination of pistachio and almond. They are sweetened only slightly with honey, and then drizzled with tahini, and a generous pinch of flaky salt. They are a delicious celebratory treat, but they also make a delightful snack any time.
I hope this year brings you your own Mimouna parties, or a chance to throw your own with these delicious treats.
Here are the two recipes:
MUFLETA
Ingredients:
1½ cups warm water
1 packet (2¼ teaspoons) active dry yeast
1 teaspoon sugar
4 cups all purpose flour, plus more if needed
1 teaspoon kosher salt
Oil as needed (sunflower, canola or a neutral tasting oil)
Directions:
1. Combine the yeast and sugar with the warm water, make sure the water is not too hot or too cold, or your yeast won’t properly activate. Allow the yeast to get foamy and bubbly, about five minutes.
2. Combine the flour and salt together.
3. Make a well in the flour, and then add the water and yeast mixture. Using your hands, incorporate the water into the flour. The amount of flour you need can depend on the brand of the flour as well as the humidity/temperature in your kitchen. You want the dough to be slightly tacky to the touch, but it shouldn’t stick to your hands. If you find your dough is too sticky, add a little more flour as needed.
4. Once the dough is formed into a ball, knead the dough until smooth and elastic, about five minutes.
5. Lightly grease the bowl with oil, and then place the dough into the bowl. Cover the bowl with a damp, clean dish towel and allow to rise for 40 minutes. Some folks form their dough into balls before letting it rise, and some prefer to do it after.
6. Generously drizzle a baking sheet or pyrex with more oil. Pull off golf ball-sized rounds of dough and form them into balls. Roll them in the oil and then let them rest for about 5 minutes.
7. Form one round of dough into a paper-thin circle, about 10 inches in diameter. You want each layer to be as thin as possible, and you can do this by flattening and pressing the dough into a circle shape with your fingers, or with the help of a rolling pin. Don’t worry if a few small holes pop up here and there.
8. Over medium heat, add a few teaspoons of oil to a large nonstick or castiron skillet. Place the first round of formed dough into the skillet. Turn down the heat slightly at this point and cook the mufleta over medium low, so that it doesn’t burn. Allow the mufleta to turn golden brown, and then flip it onto the other side. This is the only layer that will get browned on both sides.
9. While the first side is browning, form the next layer of dough. Once you flip the first layer of the mufleta over, place the raw formed dough round on top of that cooked layer. Form another round of dough while the next layer is browning.
10. Once golden brown, flip again and place another layer of raw dough on the top browned side of the mufleta while the bottom cooks. You can add a little more oil to the pan after each flip. Continue this process for as long as you can manage to flip the pile of layers. If the stack gets too big to flip, remove the entire stack, and begin a new one.
SWEET STUFFED DATES
Ingredients:
20-30 large fresh dates (Medjool, Khadrawy, or Halawy)
1 cup toasted almonds
1 cup toasted shelled pistachios
6 tablespoons honey
Pinch of salt
1 tablespoon ground cinnamon
1 teaspoon ground cardamom
Tahini, to taste
Flake salt (like Maldon), to taste
Directions:
1. In a food processor, combine the almonds, pistachios, honey, salt, and spices until very finely chopped, but be careful not to overmix or the mixture can become like a nut butter. (If you don’t have a food processor you can finely chop the nuts by hand and combine everything together in a bowl).
2. Slice the dates down the middle lengthwise, removing the pit, but keeping them intact.
3. Fill the dates with the nut mixture. Just before serving, drizzle the dates with good quality tahini and a sprinkle of salt.
4. Store in the fridge for up to 1 week without the tahini and salt.

Be the first to comment on "Mimouna is the most delicious way to celebrate the end of Passover"